====== Alter Kram ======
Alter Linux Kram, gesammelt über die Jahre, keinen sittlichen Nährwert, aber bevor ich es wegschmeiße ... :-)
====== ======
Hello, on this page I just collect some linux (mandrake/ubuntu resp.
debian) or software et al related stuff, problems I got and solutions I found in wilde...
It's just a scratchbook for myself, if anyone else read it, on own
danger :-)
In some cases, I just copied the web pages, but everytime with the link.
If anybody is offended by this, just mail, and the content will be
removed.
This page ist optimized for nothing, I'm pretty sure, it isn't compliant to any W3C standard :-)

It's just hacked in with Mozilla Composer (initially), now with an ordinary  texteditor with ftp support (pspad)
...Hey, I don't want a design award ...
====== Useful Firefox Extensions ======
- Must Haves
- mouse gestures
- tab mix plus (includes session saver)
- adblock (bzw. adblock plus)
- adblock filterset.g updater
- fasterfox
- stumbelupon
- Might Haves
- open link in
- linkification
- dictionary tooltip
- plain text links
- bug me not
- dictionary search
- gTranslate
===== Mandrake 10 Fallstricke =====
NVIDIA Treiber:
Kernel Sourcen müssen installiert sein. Wenn das Setup nicht
funktioniert, dann
sh NVIDIA-Linux-x86-1.0-5336-pkg1.run --add-this-kernel
Dadurch wird
NVIDIA-Linux-x86-1.0-5336-pkg1-custom.run
erzeugt, was dann laufen sollte...

In der XF86Config-4 dann:
Bei Module:
 Load "glx" # 3D layer

Bei Device
nv ersetzen durch nvidia


KDE

Kslideshow: Setup funktioniert anfangs nicht, die Datei
$HOME/.kde/share/config/kslideshow.kssrc
muss folgendermassen angelegt werden:

[KFileDialog Settings]
Preview Size=60
Recent Files=/usr/share/backgrounds/images/
ShowPreviews=false
ViewMode=SmallColumns

[KFileDialog Speedbar]
Speedbar IconSize=32

[Settings]
Delay=60
Directory=$HOME/
PrintName=false
RandomPosition=false
ShowRandom=true
SubDirectory=true
ZoomImages=false
Dann funktioniert das Setup.
===== Ubuntu =====
Zum Java Installieren:
http://wiki.osuosl.org/display/DEV/Java+on+Debian
Evt. kein Sound in Spielen (Tuxracer etc...) :
sudo apt-get install libsdl1.2debian-all
hat geholfen ...
Allgemeines:
Mozilla, recht gute Sammlung guter Extension:
http://www.silentblue.net/mtarchives/000576.html
Dictionary Search, Autoscroll, MultiZilla, OptiMoz
Noch ein paar Extensions: http://piro.sakura.ne.jp/xul/xul.html
Ubuntu/Debian
Probleme mit qt3: evt. die links unter /usr/share/qt3 neu anlegen:
ln -s /usr/lib/qt3/plugins plugins
ln -s /usr/include/qt3 include
Probleme mit apt-get/synaptic:
wenn z.Bsp. so was kommt:
Entpacke Ersatz für libwxgtk2.4-python ...
dpkg: Fehler beim Bearbeiten von /var/cache/apt/archives/libwxgtk2.4-python_2.4.2.6.1_i386.deb (--unpack):
 versuche »/usr/bin/helpviewer« zu überschreiben, welches auch in Paket wxpython2.5.3 ist
Fehler traten auf beim Bearbeiten von:
/var/cache/apt/archives/libwxgtk2.4-python_2.4.2.6.1_i386.deb
dann hilft vielleicht
dpkg -i var/cache/apt/archives/libwxgtk2.4-python_2.4.2.6.1_i386.deb
dann
apt-get install -f

und dann evt.
apt-get upgrade
Kernel Compile: http://ubuntuforums.org/showthread.php?t=12823&page=1&pp=10
Auszug:
4. Unpack the sources (make sure to move/rename any previous
directories which conflict, like /usr/src/modules/nvidia-kernel and
/usr/src/linux-source-2.6.8.1)
$ cd /usr/src
$ tar jxvf linux-source-2.6.8.1.tar.bz2
$ tar zxvf nvidia-kernel-source.tar.gz
$ ln -s linux-source-2.6.8.1 linux
5. If you want to use your current kernel's configuration (which you
probably do) you can copy it from /boot like this (if your current
kernel version is older, it will tell you about any new kernel
configuration options. You can choose the defaults by pressing enter):
$ cd /usr/src/linux
$ cp /boot/config-`uname -r` .config
$ make oldconfig
6. Configure the kernel to not include the Nvidia Riva framebuffer
driver (FB_RIVA under Device Drivers->Graphics Support->Support
for frame buffer devices), because it might conflict with the new
nvidia driver. You can also change any other kernel option you like,
then save the kernel configuration and exit. Note that this step is
recommended by Nvidia in their README file which accompanies their
kernel module source package, but in most cases the module will work
even without performing this step:
$ cd /usr/src/linux
$ make gconfig
7. Compile the kernel and nvidia module (note you can replace "custom1"
with any string to append to the version. This guarantees that your new
kernel version is unique, so there are no conflicts with existing
kernels):
$ cd /usr/src/linux
$ make-kpkg clean
$ fakeroot make-kpkg --initrd --append-to-version custom1 kernel_image
modules_image
8. Install the new kernel-image and nvidia-kernel packages
$ cd /usr/src
$ sudo dpkg -i kernel-image-2.6.8.1custom1*.deb
$ sudo dpkg -i nvidia-kernel-2.6.8.1custom1*.deb
weiterer Ubuntu Kram
http://www.ubuntuforums.org/showthread.php?t=22646
THIS IS FOR HOARY HEDGEHOG 5.04 USERS ONLY!
This is the first release of this script it may contain bugs. If it
blows up your system sorry

you have been warned.
I have tested it 5 or 6 times and nothing has gone wrong on fresh
installations. However it should work just fine if you have been
running hoary and want to setup these things.
3/28/2005 - Initial Release
Purpose: To automate installation of the following programs
because I am lazy and hate selecting to install them manually after I
format my computer (which is often) so this script saves me alot of
time and I hope it helps you too.
build-essential - Compilers needed to build programs
beep-media-player - XMMS gtk2 clone. Compatible with XMMS plugins/skins
gstreamer0.8-mad - Add MP3 support for Rhythmbox
w32codecs - Windows codecs for playing various files
streamtuner - Online music streamer from shoutcast and a few others
xine-ui - The xine video player, user interface for playing dvd's and such
totem-xine - Have totem use xine so you can actually use it to play videos etc.
msttcorefonts - Windows True Type Fonts
acroread - Latest version of Adobe Acrobat Reader
acroread-plugin - Firefox Acobat Reader Plugin
libdvdcss2 - DVD Library
gnomebaker - The best gnome/gtk2 cd/dvd/cdrw burning software
gftp - Ftp Client
flashplayer-mozilla - Flash plugin for firefox
Java JRE 1.5 - Latest version of Java
Custom Firefox Forms - Make you firefox form widgets look decent
/etc/apt/sources.list - Add in universe, multiverse and misc repositories
Misc Windows Fonts - Misc fonts that are missing in the msttcorefonts package
Lets get on to the real fun.
Code:
Open a terminal session and enter:
wget http://download.ubuntuforums.org/ubuntusetup/ubuntusetup.sh
sudo sh ubuntusetup.sh

You will be asked to select "Yes" or "No" on various things you will want to select yes on them.
Thats it
If it completes you are all set.
Regards, ubuntu-geek
Support UbuntuForums: Make a Donation
Apt / dpkg Kram
http://newbiedoc.sourceforge.net/tutorials/apt-get-intro/info.html.en
finds installed packages marked to be purged.
% dpkg -l '*' | grep "^i[^i]"
|
lists packages marked for installation, that
aren't installed yet.
% dpkg -l \* | grep '^[^i]i'
|
shows installed packages that are marked for
anything but installation (i.e.uninstallation or purgery). See man grep for more info on grep
and man dpkg for more on the listing format.
On my system, to find out which apt packages I have installed, I can do this:
%  dpkg -l \*apt\*
Desired=Unknown/Install/Remove/Purge/Hold
| Status=Not/Installed/Config-files/Unpacked/Failed-config/Half-installed
|/ Err?=(none)/Hold/Reinst-required/X=both-problems (Status,Err: uppercase=bad)
||/ Name              Version           Description
+++-=================-=================-=============================================================
ii  apt               0.3.19            Advanced front-end for dpkg
ii  apt-move          3.0-13            Move cache of Debian packages into a mirror hierarchy
ii  aptitude          0.0.4a-4.1        Console based apt frontend
un  libapt-pkg-dev    <none>            (no description available)
un  libapt-pkg-doc    <none>            (no description available)
un  libapt-pkg2.7     <none>            (no description available)
pn  task-laptop       <none>            (no description available)
|
Here, dpkg displays
its headers, and then shows all packages that have "apt" anywhere in
the title. The three libapt-* packages are not
installed (I've hilighted the "apt" strings that
belong to non-apt packages, so you can see why
they showed up. Interesting, no?)
For a slightly different approach, how about
this:
%  dpkg -l \* | grep apt
ii  apt               0.3.19            Advanced front-end for dpkg
ii  apt-move          3.0-13            Move cache of Debian packages into a mirror hierarchy
ii  aptitude          0.0.4a-4.1        Console based apt frontend
un  libapt-pkg-dev    <none>            (no description available)
un  libapt-pkg-doc    <none>            (no description available)
un  libapt-pkg2.7     <none>            (no description available)
ii  libpcap0          0.4a6-3           System interface for user-level packet capture.
pn  task-laptop       <none>            (no description available)
%
|
Here I asked to see ALL packages (dpkg -l \*) and thenI used grep
to display only those lines from the output that contained "apt". The
headers disappeared, since none of them contain "apt" -- so grep discards them.
Grub From the Ground Up
GRUB
zu finden unter http://www.troubleshooters.com/linux/grub/grub.htm
Grub From the Ground Up
Copyright (C) 2005 by Steve Litt,
All
rights reserved. Material
provided as-is, use at your own risk.
Contents
Disclaimer
This document contains a series of exercises accessing, and in some
cases overwriting, your boot loader. There's a significant possibility
of overwriting your existing boot loader, which can lead to lost time
and even lost data. There may be other risks.
You use this document at your own risk. I am not responsible
for any damage or injury caused by your use of this document, or caused
by errors and/or omissions in this document. If that's not acceptable
to
you, you may not use this document. By using this document you are
accepting this disclaimer.
Executive Summary
Grub is a world-class boot loader with insufficient documentation. In
many ways it blows the doors of LILO. For instance, it's MUCH easier to
use Knoppix to rebuild a grub boot loader than to rebuild a LILO boot
loader. However, until you're comfortable with grub, it might seem just
the opposite. All too often grub dumps you at a grub> prompt with no hint of
what you should do. You might have heard that a successful reboot is
just three commands away, but which commands? The state of grub's
documentation is such that you can't figure it out unless you already
know grub.
That catch 22 is the very purpose of this document. This document will
to give you enough grub expertise that you can create a grub boot
floppy on a working machine with grub installed (not necessarily as the
bootloader, just installed), and use that floppy to bust back into a
Linux machine with a blown bootloader, and then use that floppy to
actually install grub as the bootloader.
This document does not discuss using grub to boot or dual boot Windows,
mach, BSD, or other non-Linux operating systems. I might write on that
subject later. But in the meantime, once you're familiar with the
principles and practices of grub, given some study of existing
documentation you'll probably be able to use grub to boot non-Linux
operating systems.
Making a Simple
grub Booter Floppy
Much of this document discusses what to do at the grub> prompt, so you need to
be able to get to it. The easiest way to get to the grub> prompt is through a
simple grub boot floppy, which can be created on any machine with grub installed,
whether or not that machine actually boots with grub. The following
bash session shows exactly how to make a simple grub boot floppy:
[root@mydesk grub]# cd /boot/grub
[root@mydesk grub]# cat stage1 stage2 > /dev/fd0u1440
[root@mydesk grub]#
|
One word of caution. In 1990 you could buy 50 floppies and more than 45
of them would be good. Today you're fortunate if half the brand new
floppies you buy are good enough to reformat and use. 1990 floppy
drives cost close to $100.00, and worked quite well for a long time.
Today's floppy drives are 1/10 that price, and it seems they work only
1/10 as long. So create several
grub boot floppies, and if you get a read error during boot, use a
different floppy.
Don't actually do it yet, but one way you could get to a grub> prompt would be to
reboot the machine while the grub boot floppy is inserted, if necessary
tweak the bios to boot off the floppy, and let the reboot proceed. But
first, there is some information you absolutely need to know...
What You Absolutely
Need to Know
In order to use grub to boot a computer, you need to know the following:
- The partition containing the kernel
- Within that partition, the directory path and filename of the
kernel
- The partition containing /sbin/init
In addition, you might need the partition, path and filename of the
initrd file, but usually this is not necessary with grub.
|
NOTE
I have seen cases in which a kernel would kernel panic without an initrd statement, and would
boot with it. The interesting thing is, once I got it booting, I could
remove the initrd statement, rerun grub's
setup, and it would now boot without the initrd statement. If you get
kernel panics and it isn't obvious why, don't hesitate to insert an initrd statement.
|
Now let's take a look at an example. Imagine a system in which /dev/hda1 is mounted as /boot, and /dev/hda9 is mounted as /. Within /boot the kernel filename is vmlinuz-i686-up-4GB. Now let's
answer the four questions:
- The partition containing the
kernel = /dev/hda1, or (hd0,0) in grub-speak
- Within that partition, the
directory path and filename of the kernel = /vmlinuz-i686-up-4GB
(Remember, /dev/hda1 is mounted directly to /boot, so it contains the kernel directly)
- The partition containing
/sbin/init is /dev/hda9
In that case, here are the grub commands you would input to boot that
system:
grub> root (hd0,0)
grub> kernel /vmlinuz-i686-up-4GB root=/dev/hda9
grub> boot
The preceding is usually sufficient to boot a Linux box. The standalone
root statement tells the
partition containing the kernel. The kernel statement describes the
path and filename, within the
partition containing the kernel of the kernel. The argument to
the root= argument to the kernel statement tells the
partition containing /sbin/init,
which of course turns out to be the root partition in the booted
system.
Be careful of these duelling root
keywords. The standalone one is the root as seen from grub, and
contains the kernel. The argument to the kernel statement is the root as
seen from the fully booted system, and contains /sbin/init.
Be careful also of where you use grub partition notation and where you
use Linux partition notation. You use grub partition notation ((hd0,0)) everywhere except the root= argument to the kernel statement. In the root= argument you use the
Linux partition notation. Note that in Linux notation, the drive starts
with a for the first IDE
port master, then b for
the first IDE port slave, then c
for the second IDE port master, and d for the second IDE port
slave, on and on throughout your IDE ports. In Linux notation, the
partition number within the drive starts with 1.
In grub partition notation, the first accessible hard drive is (hd0), the next accessible hard
drive (even if it's on the 3rd, 4th or higher IDE port) is (hd1), and so forth. In grub
partition notation, the partition number is zero based. Thus:
/dev/hda1 is the same partition as (hd0,0)
Occasionally you'll need to specify an initrd, although this is rare.
If so, after the kernel statement and of course before the boot statement, insert the
following:
initrd /initrd-i686-up-4GB.img
It's absolutely essential that if you do use an initrd statement, that the initrd file you reference must
match the kernel you referenced earlier.
|
NOTE
I have seen cases in which a kernel would kernel panic without an initrd statement, and would
boot with it. The interesting thing is, once I got it booting, I could
remove the initrd statement, rerun grub's
setup, and it would now boot without the initrd statement. If you get
kernel panics and it isn't obvious why, don't hesitate to insert an initrd statement.
|
Another documented way to boot from grub is to put the grub-root in the
kernel statement itself instead of as a separate entity:
grub> kernel (hd0,0)/vmlinuz-i686-up-4GB root=/dev/hda9
grub> boot
If you do that, you'll need to also specify the grub root ((hd0,0)) on any initrd statement.
Booting Up Foreign Distros
Let's say you're a United States English speaker using grub to bust
back into a Knoppix machine that lost its boot loader. The commands
discussed previously would put you in Knoppix just fine, but the error
messages and even the console keyboard would be German (Deutsch). If
you wanted to boot up in American English, you'd add the argument lang=us to the kernel
statement, like this:
grub> kernel (hd0,0)/vmlinuz-i686-up-4GB root=/dev/hda9 lang=us
grub> boot
or
grub> root (hd0,0)
grub> kernel /vmlinuz-i686-up-4GB root=/dev/hda9 lang=us
grub> boot
The Single Partition Configuration
The preceding example detailed a system with a dedicated /boot partition. Especially in
these days of modern bioses that can boot past cylinder 1024, many
people don't use a separate partition for /boot. Imagine if the root
partition were /dev/hda1,
and /boot was just
another directory on that partition. In that case, here are the
commands you'd use:
grub> root (hd0,0)
grub> kernel /boot/vmlinuz-i686-up-4GB root=/dev/hda1
grub> boot
The only difference is here the grub root is the same as the booted
system root.
Having Grub Do
Your Research For You
Often you know the partition containing the kernel, the kernel
directory and name, and which partition mounts to root after boot. In
that case booting Linux from grub is trivial.
Other times you're not so lucky. Like when you accidentally messed up
LILO, or when you or someone else installed Windows, inadvertently
overwriting the boot loader on the MBR. That's when you need grub the
most, but that's also when you're least likely to know the partition
containing the kernel, the partition that will ultimately be root, and
the name of the kernel. Luckily, grub can help.
Your first step is to find the partition containing the kernel and the
partition containing /sbin/init.
Now type the following at the grub>
prompt:
find /sbin/init
On a machine with three different Linux OS's installed, the answer
would come back something like this:
grub> find /sbin/init
 (hd0,8)
 (hd0,11)
 (hd1,11)

grub>
|
In the preceding example, you've found three different partitions
containing /sbin/init:
Grub partition specification
|
Linux partition specification
|
(hd0,8)
|
/dev/hda9
|
(hd0,11)
|
/dev/hda12
|
(hd1,11)
|
/dev/hde12
Note: I infer that hd1 maps to hde because on this particular machine
there are two hard disks, one at hda and one at hde.
|
Next, find all partitions containing the kernel. Our first attempt
assumes that at least one kernel will have filename vmlinuz.:
grub> find /vmlinuz
 (hd0,0)
 (hd0,11)
 (hd1,11)

grub>
|
Then perform the same search for vmlinuz
in a directory called /boot:
grub> find /boot/vmlinuz
 (hd0,11)
 (hd1,11)

grub>
|
Here we find only two of the three we found in the first attempt,
because on this machine, (hd0,0)
is mounted as /boot on
one of the OS's.
Grub's find command is
limited. It can find only regular files, not directories. Usually the
entire directory path must be specified, although for some reason it
finds a couple /boot/vmlinuz
when you use find on /vmlinuz.
Don't count on that behavior.
Another technique for finding info in grub is to use its file
completion feature. Let's say you know the kernel is on (hd0,0) and the kernel file
begins with vml. Press the tab key
after issuing this partial command:
null (hd0,0)/vmlinuz
Grub performs file completion much like you see at a Linux command
prompt.
grub> null (hd0,0)/vmlinuz
 Possible files are: vmlinuz vmlinuz-2.6.3-7mdk vmlinuz-2.6.3-7mdk-i686-up-4GB
vmlinuz-i686-up-4GB

grub>
|
In the preceding, the word null
is not a keyword, but instead a word chosen because it is not a
keyword. Instead of "null", you could have used "whatever" or "bogus"
or any other non-keyword. Once you get the list, you can complete a
little more and then press tab again, just like at a bash prompt. By
doing so you minimize the likelihood of transcription errors.
Occasionally grub won't easily give you all the necessary information.
If you need more information than grub can conveniently provide, boot
Knoppix. See Troubleshooters.Com's Knoppix
Knowhow site for details.
Making a Full grub
Boot Floppy
In this document's first article you created a simple Grub boot floppy
without a filesystem. This is adequate to boot a computer, but not to
install grub on the computer. Installing grub requires a boot floppy
with grub on a filesystem. You can do that on any Linux box on which
grub is installed. The following are the steps:
[root@mydesk root]# mkfs -t ext2 -c /dev/fd0u1440
[root@mydesk root]# umount /dev/fd0
[root@mydesk root]# umount /dev/fd0u1440
[root@mydesk root]# mkdir /mnt/test
[root@mydesk root]# mount /dev/fd0u1440 /mnt/test
[root@mydesk root]# mkdir -p /mnt/test/boot/grub
[root@mydesk root]# cp /boot/grub/stage1 /mnt/test/boot/grub
[root@mydesk root]# cp /boot/grub/stage2 /mnt/test/boot/grub
[root@mydesk root]# chmod a-w /mnt/test/boot/grub/stage2
umount /dev/fd0u1440
[root@mydesk root]# grub
grub> root (fd0)
grub> setup (fd0)
grub> quit

[root@mydesk root]#
You now have a bootable grub floppy with which you can boot a computer.
One more thing should go on the floppy -- an example menu.lst. The menu.lst file is what brings up
a "grub menu", and is vital for actually installing the grub bootloader
on another computer. On the computer you need to boot, you can edit the
menu.lst file to produce a
grub menu on boot, and to actually install grub on the system. Note
that the example menu.lst
shoud NEVER be copied to the floppy before all the steps listed above
this paragraph. Here is a typical session showing how to perform the
copy. Note that once again, a mount
and unmount must be
performed.
[root@mydesk root]# mount /dev/fd0u1440 /mnt/test
[root@mydesk root]# cp -p /usr/share/doc/grub-doc-0.93/menu.lst /mnt/test/boot/grub/
stage1  stage2
[root@mydesk root]# cp -p /usr/share/doc/grub-doc-0.93/menu.lst /mnt/test/boot/grub/menu.lst.example
[root@mydesk root]# umount /dev/fd0u1440
[root@mydesk root]#
Installing grub From
Floppy
Do not perform this exercise until you've practiced the earlier
exercises. Knowledge of the operation of the grub command line
interface is vital to creating and installing a menu driven grub.
|
WARNING
This exercise walks you through creating a floppy based grub boot
floppy on a grub installation on computer 1, and then using that floppy
to boot and configure grub on computer 2. It WILL wipe out any existing
boot loader from computer 2. Hopefully it will replace that boot loader
with grub, but there are no guarantees. In fact, this document
addresses only Linux grub setups, so if you have Windows or BSD
installed, this document cannot help you recover.
Therefore, computer 2 MUST be an experimental computer whose data and
OS you can afford to lose.
|
In the Making a Full grub
Boot Floppy exercise you created a boot diskette with stage1, stage2, and an example menu.lst named menu.lst.example. Now it's time
to use that floppy on another system. As mentioned in the preceding
warning, that other system must be an experimental system whose boot
loader you can afford to overwrite, possibly unsuccessfully.
Insert the full grub boot floppy in the experimental computer, shut the
computer down in an orderly fashion, and reboot the computer. During
BIOS boot, make sure the computer's first boot drive is the floppy.
It is very likely that the the other system has grub installed. To
temporarily move its files aside, do the following:
mv /boot/grub /boot/orggrub
mv /sbin/grub /sbin/orggrub
mv /sbin/grub-install /sbin/orggrub-install
Basically, rename directory /boot/grub,
and then rename all grub executables. In this way you're simulating a
machine that has never had grub installed, yet you can "put back" the
files with a couple more renames. However, it is not so simple to "put
back" the MBR.
The basic procedure is as follows:
- Boot from the grub floppy
- Copy files from the floppy to /boot/grub on the hard disk
- Configure /boot/grub/menu.lst
for this computer
- Reboot from floppy, and install grub
Boot from the grub floppy
grub> root (hd0,0)
grub> kernel /vmlinuz-i686-up-4GB root=/dev/hda9
grub> boot
As mentioned before, if booting to a foreign language distro, use the
appropriate lang= kernel
argument so that you can work in your native tongue. If everything went
right, your experimental system is now booted.
Copy files from the floppy to /boot/grub
on the hard disk
First make sure there's no /boot/grub.
If there is, rename it, because you sure don't want to overwrite it
just to perform this exercise.
Now perform the following commands:
mkdir /mnt/test
mount /dev/fd0u1440 /mnt/test
cp -Rp /mnt/test/boot/grub /boot
Configure /boot/grub/menu.lst
for this computer
If you began this document as a grub newbie, the sample menu.lst that ships with grub
would have been useless to you. What a difference a few exercises can
make. You now know how to boot a computer from the grub> prompt. You know the
difference between the grub root and the root directory seen by Linux
after bootup. You know how to structure a grub kernel statement.
A menu.lst file is
basically just the same list of commands you'd use at the grub> prompt, except that
the boot command is not
included. The example menu.lst
has commands for installing operating systems from mach to Windows, and
it even has an entry that installs grub on the system and another that
changes the menu colors. All of that is extraneous. What you want to do
is delete all the non-Linux stuff, and configure the Linux commands to
match your experimental machine's kernel partition, Linux root
partition, and kernel filename. The following is an example of such an
edited example file saved as menu.lst:
#
# Sample boot menu configuration file
#

# Boot automatically after 30 secs.
timeout 30

# By default, boot the first entry.
default 0

# Fallback to the second entry.
# fallback 1    # BE SURE TO COMMENT THIS OUT!!!!!!!!!!!!!!

# For booting GNU/Linux
title  GNU/Linux
root (hd0,0)
kernel /boot/vmlinuz-2.6.7 root=/dev/hda1 lang=us
|
A few notes are in order:
- BE SURE to comment out the "fallback 1", because there is no
choice 1, only a choice 0.
- The default 0
statement simply points to which choice will run if the user makes no
choice within the timeout period.
- The lang= is
unnecessary unless you're booting up a foreign distro and want to see
it in your native language.
- The root (hd0,0)
needs to be adjusted to point to the partition containing the kernel.
- The root=/dev/hda1
needs to be adjusted to point to the partition that will be mounted as
root after booting. Note that it is expressed in Linux notation, not in
grub notation.
- The kernel statement points to the kernel relative to the grub root. In the preceding file
it points to /boot/vmlinuz-2.6.7
in the Linux root partition. If Linux used a partition just for /boot, and that partition were /dev/hda1 as is typical of boot
partitions, then the kernel would point to /vmlinuz-2.6.7 instead of /boot/vmlinuz-2.6.7, because
the file would be on the root of the boot partition, and would become
subservient to /boot only
after the partition is mounted by Linux.
- Grub's default menu file is /boot/grub/menu.lst.
You can use a different file, but it would require jumping through
quite a few hoops. Use the default.
- None of this is new to you. You already did all of this at the grub> prompt in previous
exercises.
Your /boot/grub/menu.lst
file is now complete. If you created it correctly, you can now install
grub from your floppy:
Reboot from floppy, and install grub
Insert your full grub boot floppy in the experimental machine, and
reboot. The machine boots to the floppy, and you are presented with the
grub> prompt. From
there, installation is easy, assuming you've done the previous steps
correctly:
grub> root (hd0,0)
grub> setup (hd0)
grub> reboot
|
The machine reboots again, and if you remove the floppy, you are
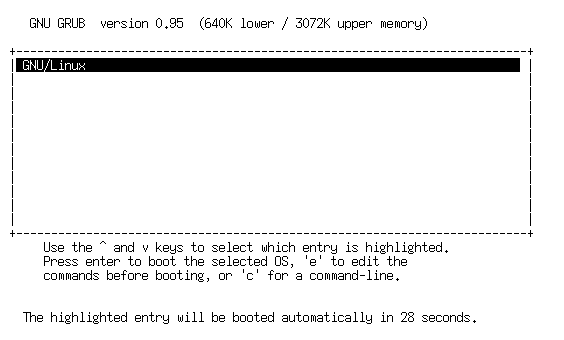
presented a 1 item grub menu. This is what it looks like:
Pressing Enter on that item boots the kernel listed in your menu.lst. A few notes are in
order:
- Never remove the floppy while the floppy light is on
- If you fail to remove the floppy before the reboot reaches the
bootloader, it will boot from floppy again. In that case, just boot
from floppy as you have in prior exercises, and then remove the floppy
and reboot the machine to get the menu.
Summary
Thats it. You created a bootable floppy with stage1, stage2 and an example menu
file, and used that floppy to install a grub bootloader on a machine.
This is how you can take a machine with a blown bootloader and
configure it to boot with grub.
However, your "grub installation" falls short. None of the grub
executables are there:
- grub
- grub-floppy
- grub-install
- grub-md5-crypt
- grub-reboot grub-terminfo
Also, many files normally placed in /boot/grub are not there:
- device.map
- e2fs_stage1_5
- jfs_stage1_5
- minix_stage1_5
- reiserfs_stage1_5
- xfs_stage1_5
The other thing you don't have is the documentation that usually comes
in /usr/share/grub.
Once you get the machine booting in a stable manner, you'll probably
want to install grub from a package manager or by compiling the source.
Be sure to back up your existing /boot/grub/menu.lst.
Working With a
Fully Installed grub
You don't want to reboot to floppy just to get to a grub> prompt or to make
changes to the bootloader on your MBR. Once you've installed the full
grub package you don't need to. You can use grub-install to install a newly
configured boot loader without resorting to your boot floppy. You can
use grub to view the
results of a new menu.lst.
After you've installed grub (or restored the original installation by
undoing the renames), edit your menu.lst
, insert a second entry that boots the 2.4 kernel instead of the 2.6,
name each entry for its kernel number, and restore the. Here is the
resulting file:
#
# Sample boot menu configuration file
#

# Boot automatically after 30 secs.
timeout 30

# By default, boot the first entry.
default 0

# Fallback to the second entry.
fallback 1

# For booting GNU/Linux
title  26
root (hd0,0)
kernel /boot/vmlinuz-2.6.7 root=/dev/hda1 lang=us

# For booting GNU/Linux
title  24
root (hd0,0)
kernel /boot/vmlinuz-2.4.27 root=/dev/hda1 lang=us
|
The preceding file has two boot choices: One for the 2.6 kernel
(appropriately named 26) and one for the 2.4 kernel (appropriately
named 24). It defaults to 26, but if for some reason 26 won't boot it
falls back to 24.
Once the file is saved, perform the following command:
grub-install /dev/hda1
|
NOTE
To get the same result, you can also run grub, either from a command
line or via a grub boot floppy, and perform the following command
sequence:
grub> root (hd0,0)
grub> setup (hd0)
The preceding assumes that the kernel is located on (hd0,0), which is
otherwise known as /dev/hda1, and that you're installing it to the MBR
of the first hard disk, also known as /dev/hda1.
|
The next time you boot your computer, you'll see choices 26 and 24, and
they'll do the right thing, as follows:
If you want to view the menu without rebooting, try this command:
grub --config-file \(hd0,0\)/boot/grub/menu.lst
In the preceding, note that you need to escape the parentheses of the
grub partition because otherwise the shell will interpret those
parentheses as special characters. Perform that command and you'll see
the menu, which looks like the following:
However, you cannot actually boot from grub run on the
command line.
Options from the grub menu
We all hope every item on the menu produces a clean boot. If not, you
can either edit individual commands in a given menu choice by pressing
the e key, or drop
down to the grub command prompt by pressing the c key. Generally speaking, you
edit commands if you suspect the menu choice is close to a correct
configuration, and you drop directly to the grub command prompt if you
suspect the menu item to be totally wrong, or if you need the
facilities of grub's find
command or its command completion feature.